Of all the dev projects I have created, the post stats plugin for Micro.blog has been close to me. It gave me insights about my writing that I loved.
Since I published the first version of this plugin in December 2021, I have wanted to revamp the stats page. I had accumulated a list of insights that were not present, but needed to be.
With v2, they do — a complete rebuild, not a minor update. Here’s the snapshot (demo).
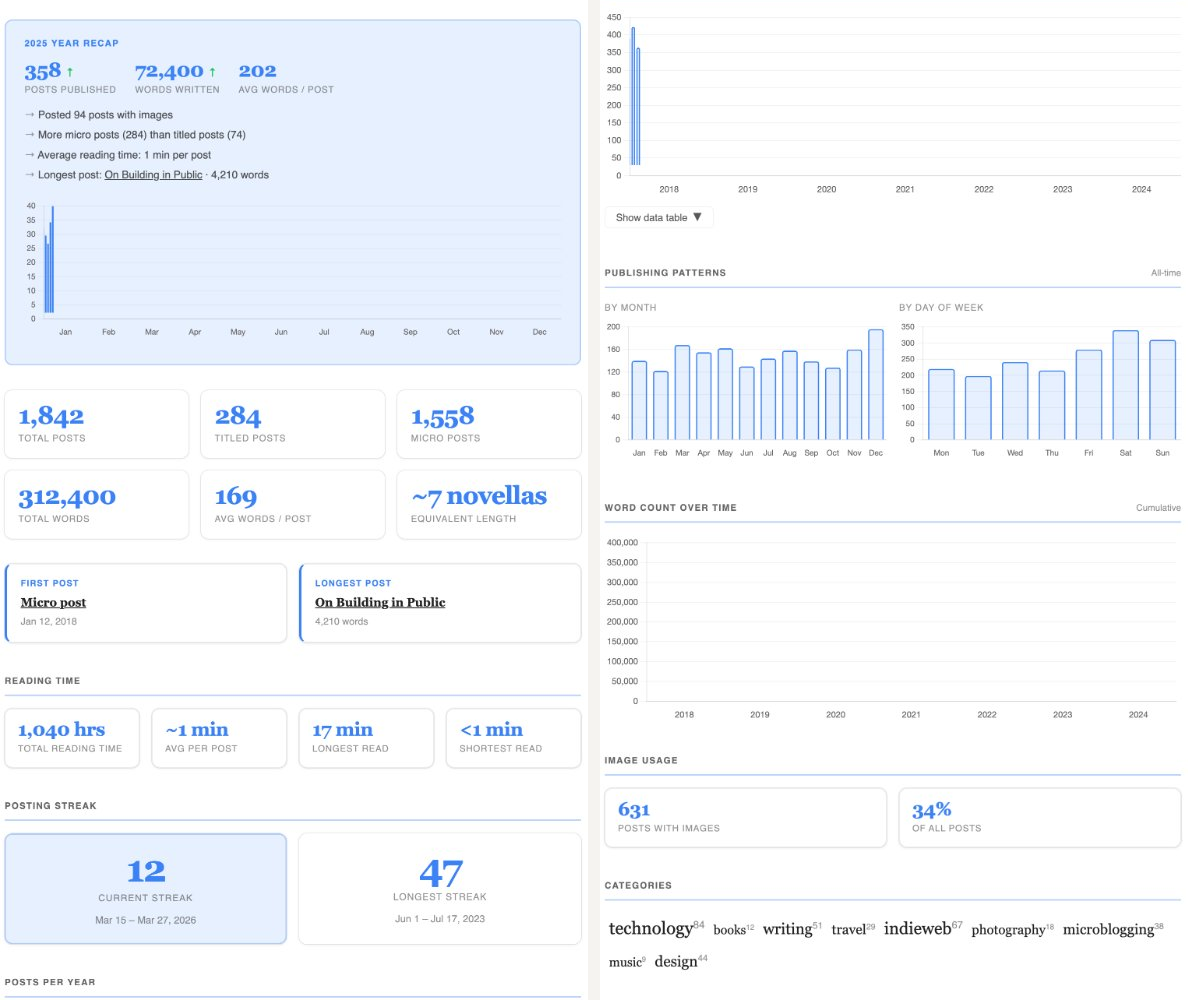
How long does it take to read everything you’ve ever written? What’s your longest posting streak? When do you actually post? v2 answers all of this in a modern card-based layout.
I have already discovered that I had a 65-day posting streak back in early 2022 — I had no idea. Or that I post equally across the days of the week. Apparently, I’m more consistent than I thought.
Head over to the plugins page to upgrade to v2. Let me know what’s missing.